| This page is a part of our Journal collection. Click here to return to the journal. |


Roxas Prologue[edit | edit source]
Roxas' treasures are not accessible until the 3rd Day and cannot be collected outside of Roxas' story. They are not listed in Jiminy's Journal.
| Item | Location | Notes |
|---|---|---|
| Potion | Station of Serenity | Appears after defeating the Dusks. |
| Potion | Station of Calling | On the left after climbing the first flight of stairs. |
| Potion | Central Station | In the Northeast corner of the station, by the door marked 1. |
| Hi-Potion | Central Station | In the Western part of the station, between the two tracks and near the front of the train. |
| Hi-Potion | Central Station | At the bottom of the staircase in the Southwest corner of the station. |
| Potion | Sunset Terrace | Upon entering this area from Sunset Station, follow the walkway to the left to discover the chest between a light and a tree. |
| Hi-Potion | Sunset Terrace | In the Northwestern part of the area, at the end of a small wooden bridge, near a tree. |
| Potion | Sunset Terrace | On a balcony to the left of the Sunset Hill entrance. |
| Ability Ring | Sunset Terrace | Climb to the top of the tram and use it to jump across to a small rooftop near the Eastern end of the tracks that holds the chest. |
| Potion | Mansion: Foyer | Upon entering the area, take the staircase on the left to find the chest on the first landing. |
| Hi-Potion | Mansion: Foyer | In front of the glass doors on the bottom floor. |
| Potion | Mansion: Foyer | In the middle of the second floor landing. |
| Potion | Mansion: Dining Room | On the South side of the room. |
| Elven Bandana | Mansion: Dining Room | In the Southwestern corner of the room. |
| Hi-Potion | Mansion: Library | On the right after traveling down the stairs. |
| Hi-Potion | Mansion: Basement Corridor | On the right upon entering the area. |
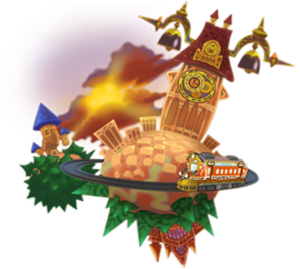
Twilight Town[edit | edit source]
(1) |
(2) |
(3) |
(4) |
(5) |
(6) |
(7) |
(8) |
(9) |
(10) |
(11) |
(12) |
(13) |
(14) |
(15) |
(16) |
(17) |
(18) |
(19) |
(20) |
(21) |
(22) |
(23) |
(24) |
(25) |
(26) |
(27) |
(28) |
(29) |
(30) |
(31) |
(32) |
(33) |
(34) |
(35) |
(36) |
(37) |
(38) |
(39) |
| # | Photo | Item | Location | Notes |
|---|---|---|---|---|
(1) |
Potion | The Old Mansion | In the corner, to the West of the gates. | |
(2) |
Mythril Shard | The Old Mansion | In the corner, to the right of the Mansion doors. | |
(3) |
Potion | The Woods | Along the outside of the perimeter, in the Southwestern part of the map. | |
(4) |
Mythril Shard | The Woods | Along the outside of the perimeter, in the Northwestern part of the area. | |
(5) |
Hi-Potion | The Woods | Along the outside of the perimeter, in the Northeastern part of the area. | |
(6) |
Hi-Potion | Market Street: Tram Common | In front of a small, green roofed building north of the Sandlot entrance. | |
(7) |
AP Boost | Market Street: Tram Common | On top of the blue roofed building to the left of The Woods entrance. The roof can be accessed by jumping across the green rooftops on the building's left. | |
(8) |
Tent | Market Street: Tram Common | Take the stairs to the right of the Accessory Shop and follow the path to the downwards sloping stairs to find the chest resting against a wall beside a lamppost. | |
(9) |
Mythril Shard | Market Street: Tram Common | Head down the two flights of stairs to the right of the Accessory Shop to find the chest slightly to the left of a bridge. | |
(10) |
Potion | Market Street: Tram Common | Against a wall behind the Moogle Shop. | |
(11) |
Mythril Shard | Market Street: Tram Common | On the flat brown rooftop connected to the large green building in the North of the area. | |
(12) |
Potion | Market Street: Tram Common | Against one of the buildings to the right of The Woods entrance. | |
(13) |
Tent | Central Station | Along the wall to the left of the train entrance marked 0. | |
(14) |
Hi-Potion | Central Station | Along the wall to the right of the train entrance marked 0. | |
(15) |
Mythril Shard | Central Station | Against the far East wall, beside the train entrance marked 1. | |
(16) |
Potion | The Tower | By the bushes on the right of the path in front of the train. | |
(17) |
Hi-Potion | The Tower | By the trees on the left of the path in front of the train. | |
(18) |
Ether | The Tower | Hidden by the trees in the far corner to the left of the Tower entrance. | |
(19) |
Ether | Tower: Entryway | Against the wall, on the right when entering from outside the Tower. | |
(20) |
Mythril Shard | Tower: Entryway | Under the staircase, visible from the save point. | |
(21) |
Tower Map | Tower: Sorcerer's Loft | Beside the chalkboard, to the left of the Tower: Wardrobe entrance. | |
(22) |
Mythril Stone | Tower: Wardrobe | Beside the door. | |
(23) |
Mythril Gem | Underground Concourse | Along the path in the far East, between door 2 (the Tunnelway entrance)and door 3 (the Back Alley entrance). | |
(24) |
Orichalcum | Underground Concourse | In the corner of the small room near door 2 (the Tunnelway entrance). | |
(25) |
AP Boost | Underground Concourse | In the Southwestern corner of the room at the end of the ramp sloping down from door 5 (the Station Plaza entrance). | |
(26) |
Mythril Crystal | Underground Concourse | In the corner South of door 4 (the Market Street: Tram Common entrance). | |
(27) |
Orichalcum | Tunnelway | Against a pillar in the largest room. | |
(28) |
Mythril Crystal | Tunnelway | In the corner in front of the Sunset Terrace entrance. | |
(29) |
Orichalcum+ | Sunset Terrace | Climb to the top of the tram and use it to jump across to the rooftop near the Eastern end of the tracks that holds the chest. | |
(30) |
Mythril Shard | Sunset Terrace | In front of a building near the Western end of the tram tracks. | |
(31) |
Mythril Crystal | Sunset Terrace | Between two buildings near the Eastern end of the tram tracks. | |
(32) |
AP Boost | Sunset Terrace | In the North, at the end of the alley where the "Friend From Beyond the Wall" wonder was investigated. | |
(33) |
Mythril Crystal | Mansion: Foyer | In front of the glass doors that overlook the gardens. | |
(34) |
Mythril Stone | Mansion: Foyer | At the top of the first flight of stairs on the right. | |
(35) |
Elixir | Mansion: Foyer | In the center of the landing at the top of the stairs. | |
(36) |
Mythril Crystal | Mansion: Dining Room | Against the wall opposite the door. | |
(37) |
Mythril Stone | Mansion: Dining Room | In the corner by the door. | |
(38) |
Orichalcum | Mansion: Library | In the corner beside the statue in the bookcase. | |
(39) |
Ultimate Recipe | Mansion: Basement Corridor | Along the wall, at the end of a line of pods. |
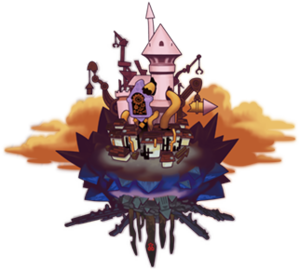
Hollow Bastion[edit | edit source]
(1) |
(2) |
(3) |
(4) |
(5) |
(6) |
(7) |
(8) |
(9) |
(10) |
(11) |
(12) |
(13) |
(14) |
(15) |
(16) |
'(17) |
(18) |
(19) |
(20) |
(21) |
(22) |
| # | Item | Location | Notes |
|---|---|---|---|
| (1) | Drive Recovery | Borough | On the Western side of the walkway leading to the Bailey entrance. |
| (2) | AP Boost | Borough | In the Southwest, hidden in the corner by the crane that sits at the top of the long stone stairs. |
| (3) | Hi-Potion | Borough | Beside the Merlin's House entrance. |
| (4) | Mythril Shard | Borough | To the East of the Bailey entrance. |
| (5) | Tent | Borough | When exiting from Merlin's House, head right to find the chest at the bottom of a small set of stairs. |
| (6) | Castle Perimeter Map | Postern | On the Southern railing of the circular area. |
| (7) | Mythril Gem | Postern | On a pipe to the right of the stairs leading to the Restoration Site. |
| (8) | AP Boost | Postern | In the South, next to a gold mechanical box at the bottom of the winding pathway. |
| (9) | Mythril Stone | Corridors | From the Postern entrance, take the Southern path at the first fork in the road, then the Eastern path at the fork after that. Head North at the next fork and follow the path straight past the next fork. Continue on to find the chest in front of a pile of debris. |
| (10) | Mythril Crystal | Corridors | From the Postern entrance, take the Southern path at the first fork in the road, then the Eastern path at the fork after that. At the next fork head South and follow the path to the chest. |
| (11) | Hi-Potion | Corridors | From the Postern entrance, take the Eastern path at the first fork and follow to the chest in the corner. |
| (12) | AP Boost | Corridors | From the Postern entrance, take the Southern path at the first fork in the road, then the Western path at the fork after that. Follow the path to the chest in the corner. |
| (13) | Skill Recipe | Ansem's Study | In the South, next to the open doorway. |
| (14) | Ukelele Charm | Ansem's Study | In the corner, on the glass walkway between the computer area and the study. |
| (15) | Moon Recipe | Restoration Site | From the Bailey entrance, hug the left wall to find the ledge that holds the chest. |
| (16) | AP Boost | Restoration Site | From the Bailey entrance, hug the left wall to find a ledge. Jump onto the ledge and hug the right wall to find the chest next to a gold pipe. |
| (17) | Torn Pages | Crystal Fissure | Opposite the Save Point. |
| (18) | The Great Maw Map | Crystal Fissure | Behind the Save Point. |
| (19) | Elixir | Crystal Fissure | Behind the Save Point. |
| (20) | AP Boost | Crystal Fissure | Behind the Save Point. |
| (21) | Gull Wing | Postern | Upon first arriving here, talk to Yuna to make the chest appear. |
| (22) | Cosmic Chain | Heartless Manufactory | Directly opposite the entrance. |
Beast's Castle[edit | edit source]
(1) |
(2) |
(3) |
(4) |
(5) |
(6) |
(7) |
(8) |
(9) |
(10) |
(11) |
(12) |
(13) |
(14) |
(15) |
(16) |
(17) |
(18) |
(19) |
(20) |
(21) |
| # | Item | Location | Notes |
|---|---|---|---|
| (1) | AP Boost | Courtyard | In the Southwest corner of the area. |
| (2) | Hi-Potion | Courtyard | From the Castle entrance, turn left to find the chest in the Northeast corner. |
| (3) | Mythril Shard | Courtyard | To the left of the entrance to the Bridge, against the wall. |
| (4) | Castle Map | Belle's Room | Against the wall to the left of the bed. |
| (5) | Mythril Shard | Belle's Room | In the corner of the room, beside the vanity. |
| (6) | Hi-Potion | The East Wing | In the corner of the West end of the map, directly in front of the Entrance Hall entrance. |
| (7) | Tent | The East Wing | Against the South wall, halfway down the hall. |
| (8) | Hi-Potion | The West Hall | On the Northern wall of the corridor that leads to the Entrance Hall, between two statues of armor. |
| (9) | Mythril Shard | The West Hall | Between two statues of armor, against the Southern wall of the corridor that leads to the Entrance Hall. |
| (10) | Drive Recovery | The West Hall | Against the wall, by the large statue on the right of the staircase. |
| (11) | Mythril Shard | The West Hall | At the end of the narrow passage on the left of the staircase. |
| (12) | AP Boost | The West Hall | At the top of the first flight of stairs. |
| (13) | Tent | The West Hall | By the corner of the wall to the left of the staircase. |
| (14) | Basement Map | Dungeon | In the corner by the door. |
| (15) | AP Boost | Dungeon | Against the Eastern wall, beside a chair. |
| (16) | Mythril Shard | Secret Passage | Against a pillar in the small raised area in the middle of the area. |
| (17) | Hi-Potion | Secret Passage | Against a pillar in the small raised area in the middle of the area. |
| (18) | Mega-Potion | Secret Passage | Against the wall of the small room just before the The West Hall entrance. |
| (19) | Mythril Shard | The West Wing | To the right at the top of the stairs. |
| (20) | Tent | The West Wing | Directly in front of the The West Hall entrance. |
| (21) | Mega Recipe | The Beast's Room | Against the wall, to the right of the rose. |
Olympus Coliseum[edit | edit source]
(1) |
(2) |
'(3) |
(4) |
(5) |
(6) |
(7) |
(8) |
(9) |
(10) |
(11) |
(12) |
(13) |
(14) |
(15) |
(16) |
(17) |
(18) |
(19) |
(20) |
| # | Item | Location | Notes |
|---|---|---|---|
| (1) | Power Boost | Underworld Entrance | Only accessible after the Olympus Stone has been stolen. Along the path to the Underworld Caverns. |
| (2) | Mythril Shard | Cave of the Dead: Passage | From the Cave of the Dead: Entrance entrance, take the ramp on the left at the fork in the road to find the chest on a ledge. |
| (3) | Mythril Stone | Cave of the Dead: Passage | Against the wall, opposite the Cave of the Dead: Inner Chamber entrance. |
| (4) | Ether | Cave of the Dead: Passage | From the Cave of the Dead: Entrance entrance, take the ramp on the left at the fork in the road and follow the passage. The chest is located halfway down the path. |
| (5) | AP Boost | Cave of the Dead: Passage | From the Cave of the Dead: Entrance entrance, take the ramp on the left at the fork in the road and follow the passage. The chest is located near the end of the path, at the bottom of the stairs. |
| (6) | Hi-Potion | Cave of the Dead: Passage | From the Cave of the Dead: Entrance entrance, take the right path at the fork in the road. The chest is found against the left wall. |
| (7) | Underworld Map | Cave of the Dead: Inner Chamber | Against a pillar, near the Save Point. |
| (8) | Mythril Shard | Cave of the Dead: Inner Chamber | Against the wall beside the Cave of the Dead: Passage entrance. |
| (9) | Hi-Potion | Underworld Caverns: Entrance | Travel through to Underworld Caverns: The Lost Road. Follow the path to the left until you reach a staircase that leads back to the Entrance. Enter to find the chest on a ledge. |
| (10) | AP Boost | Underworld Caverns: Entrance | Travel through to Underworld Caverns: The Lost Road. Follow the path to the left until you reach a staircase that leads back to the Entrance. Enter to find the chest on a ledge. |
| (11) | Mythril Shard | Underworld Caverns: Entrance | From the Underworld Entrance entrance, drop off the far right of the platform to find the chest on a small ledge. |
| (12) | Hi-Potion | Underworld Caverns: The Lost Road | From the Underworld Caverns: Entrance entrance, follow the left path to find the chest against a pile of rocks. |
| (13) | Ether | Underworld Caverns: The Lost Road | From the Underworld Caverns: Entrance entrance, follow the path to the right to find the chest against the wall. |
| (14) | Mythril Shard | Underworld Caverns: The Lost Road | When facing the Underworld Caverns: Atrium entrance, take the path on the right to find the chest against a wall. |
| (15) | Mythril Stone | Underworld Caverns: The Lost Road | Follow the path past the staircase to the Underworld Caverns: Entrance to find the chest against the wall. |
| (16) | Tent | Underworld Caverns: Atrium | From the Underworld Caverns: The Lost Road entrance, follow the wall to the right to find the chest in an alcove. |
| (17) | AP Boost | Underworld Caverns: Atrium | Follow the main path until you reach a small flight of stone stairs. The chest is on a ledge to the right, accessible by jumping. |
| (18) | Caverns Map | The Lock | Against the wall in the Southwest. |
| (19) | Mythril Shard | The Lock | Against the wall in the Northwest. |
| (20) | AP Boost | The Lock | Against the wall in the East. |
Agrabah[edit | edit source]
(1) |
(2) |
(3) |
(4) |
(5) |
(6) |
(7) |
(8) |
(9) |
(10) |
(11) |
(12) |
(13) |
(14) |
(15) |
(16) |
(17) |
(18) |
(19) |
(20) |
(21) |
(22) |
(23) |
(24) |
(25) |
(26) |
| # | Item | Location | Notes |
|---|---|---|---|
| (1) | Drive Recovery | Agrabah | Directly opposite the Mythril Shard chest near the Peddler's Shop. |
| (2) | Mythril Shard | Agrabah | In the alley to the left of the Palace entrance. Against a wall at the top of the three ledges on the South. |
| (3) | Hi-Potion | Agrabah | At the top of the stairs near the Peddler's Shop entrance. |
| (4) | AP Boost | Agrabah | Near the alley to the left of the Palace entrance. Accessed by climbing the three ledges on the South side of the alley and dropping down to the smaller ledge, where the chest sits in the corner. |
| (5) | Mythril Stone | Agrabah | In a corner of the higher levels in the West, near the Bazaar entrance. |
| (6) | Mythril Shard | Agrabah | At the top of the stairs next to the Peddler's Shop, on the right of the Bazaar entrance. |
| (7) | Mega Ether | Agrabah | On a ledge in the alley to the left of the Palace entrance. |
| (8) | Mythril Gem | Bazaar | On top of a high ledge in the far East. |
| (9) | Hi-Potion | Bazaar | Near the bottom of the staircase. |
| (10) | Hi-Potion | Bazaar | Among the merchant booths in the South. |
| (11) | AP Boost | Bazaar | Among the merchant booths in the South. |
| (12) | Mythril Shard | Bazaar | Among the merchant booths in the South. |
| (13) | Skill Ring | Palace Walls | To the right of the Cave of Wonders entrance. |
| (14) | Mythril Stone | Palace Walls | On top of a pile of boxes behind the Save Point. |
| (15) | Drive Recovery | The Cave of Wonders: Entrance | To the left of the Valley of Stone entrance. |
| (16) | Mythril Shard | The Cave of Wonders: Entrance | To the right of the Valley of Stone entrance. |
| (17) | Mythril Stone | The Cave of Wonders: Valley of Stone | On a purple ledge just in front of the entrance tunnel. |
| (18) | AP Boost | The Cave of Wonders: Valley of Stone | On a purple ledge along the South side of the room. |
| (19) | Mythril Shard | The Cave of Wonders: Valley of Stone | On a tall blue ledge along the South side of the room. |
| (20) | Hi-Potion | The Cave of Wonders: Valley of Stone | On a purple ledge along the North side of the room. |
| (21) | Cave of Wonders Map | The Cave of Wonders: Chasm of Challenges | Behind the Warp Point. |
| (22) | AP Boost | The Cave of Wonders: Chasm of Challenges | Behind the Save Point. |
| (23) | AP Boost | The Cave of Wonders: Treasure Room | Not accessible on first visit. In the Northwest corner of the area. |
| (24) | Serenity Shard | The Cave of Wonders: Treasure Room | Not accessible on first visit. In the Northeast corner of the area. |
| (25) | Torn Pages | Ruined Chamber | Opposite the Save Point. |
| (26) | Ruins Map | Ruined Chamber | Next to the Save Point. |
Land of Dragons[edit | edit source]
(1) |
(2) |
(3) |
(4) |
(5) |
(6) |
(7) |
(8) |
(9) |
(10) |
(11) |
(12) |
(13) |
(14) |
(15) |
(16) |
(17) |
(18) |
(19) |
(20) |
(21) |
| # | Item | Location | Notes |
|---|---|---|---|
| (1) | Hi-Potion | Bamboo Grove | To the right of the tallest rock. |
| (2) | Ether | Bamboo Grove | To the right of the Save Point. |
| (3) | Mythril Shard | Bamboo Grove | To the left of the tallest rock. |
| (4) | Hi-Potion | Checkpoint | In a corner on the North side of the stream, against the wooden fence. |
| (5) | Mythril Shard | Checkpoint | Behind the wagon near the Imperial Square entrance. |
| (6) | Hi-Potion | Mountain Trail | At the top of the path leading to the Checkpoint entrance. |
| (7) | Recovery Recipe | Mountain Trail | From the Village entrance, follow the path right to find a ledge that holds the chest. |
| (8) | Ether | Mountain Trail | From the Village entrance, follow the path right to find a ledge that holds the chest. |
| (9) | Mythril Shard | Mountain Trail | From the Checkpoint entrance, follow the path right and up the stairs to find the chest on a ledge. |
| (10) | AP Boost | Village Cave | Behind a rickshaw against the Western side of the entrance path. |
| (11) | Hi-Potion | Village Cave | Against the Eastern side of the entrance path. |
| (12) | Hi-Potion | Ridge | Behind the wind vortex. |
| (13) | AP Boost | Ridge | Among the rickshaw gathering in the North. |
| (14) | Torn Pages | Throne Room | Not accessible on first visit. On the ledge to the right of the throne. |
| (15) | Palace Map | Throne Room | Not accessible on first visit. On the ledge to the left of the throne. |
| (16) | AP Boost | Throne Room | Not accessible on first visit. On the right when facing the stairs snaking East off the throne platform. |
| (17) | Queen Recipe | Throne Room | Not accessible on first visit. At the bottom of the stairs snaking East off the throne platform. |
| (18) | AP Boost | Throne Room | Not accessible on first visit. On the right when facing the stairs snaking East off the throne platform. |
| (19) | Ogre Shield | Throne Room | Not accessible on first visit. At the bottom of the stairs snaking West off the throne platform. |
| (20) | Mythril Crystal | Throne Room | Not accessible on first visit. On a ledge, behind the wall that is behind the throne. |
| (21) | Orichalcum | Throne Room | Not accessible on first visit. On a ledge, behind the wall that is behind the throne. |
100 Acre Wood[edit | edit source]
(1) |
(2) |
(3) |
(4) |
(5) |
(6) |
(7) |
(8) |
(9) |
(10) |
(11) |
(12) |
(13) |
(14) |
(15) |
(16) |
(17) |
(18) |
(19) |
(20) |
| # | Item | Location | Notes |
|---|---|---|---|
| (1) | 100 Acre Wood Map | Pooh's House | At the end of the path. |
| (2) | AP Boost | Pooh's House | To the right of the back side of the house. |
| (3) | Mythril Stone | Pooh's House | To the right of the back side of the house. |
| (4) | Defense Boost | Piglet's House | On top of a tree stump to the right of the house. |
| (5) | AP Boost | Piglet's House | Leaning against the left side of the house. |
| (6) | Mythril Gem | Piglet's House | In front of a tree stump to the left of the house. |
| (7) | Draw Ring | Rabbit's House | Behind Rabbit's washing line. |
| (8) | Mythril Crystal | Rabbit's House | In a corner, along the outside of the pumpkin patch fence. |
| (9) | AP Boost | Rabbit's House | In the pumpkin patch. |
| (10) | Magic Boost | Kanga's House | Against the left side of the house. |
| (11) | AP Boost | Kanga's House | On the far right of the house, in front of a tree stump. |
| (12) | Orichalcum | Kanga's House | Against the right side of the house. |
| (13) | Mythril Gem | Spooky Cave | In the center of the first patch of ice. |
| (14) | AP Boost | Spooky Cave | At the end of the first path on the right in the room with the second bee attack. |
| (15) | Orichalcum | Spooky Cave | At the end of the first path on the left in the room with the second bee attack. |
| (16) | Guard Recipe | Spooky Cave | Along the third path in the room with the second bee attack. |
| (17) | Mythril Crystal | Spooky Cave | Along the third path in the room with the second bee attack. |
| (18) | AP Boost | Spooky Cave | On a patch of ice just before you rescue Pooh. |
| (19) | Cosmic Ring | Starry Hill | Over the bridge, amongst the bushes. |
| (20) | Style Recipe | Starry Hill | At the back of the right side of the hill. |
Pride Lands[edit | edit source]
(1) |
(2) |
(3) |
(4) |
(5) |
(6) |
(7) |
(8) |
(9) |
'(10) |
(11) |
(12) |
(13) |
(14) |
(15) |
(16) |
(17) |
(18) |
(19) |
(20) |
(21) |
(22) |
(23) |
(24) |
(25) |
| # | Item | Location | Notes |
|---|---|---|---|
| (1) | Savannah Map | Gorge | Beside the steaming pool. |
| (2) | Ether | Gorge | Against the Eastern wall, opposite the Save Point. |
| (3) | Mythril Stone | Gorge | Against the Northern wall, opposite the Save Point. |
| (4) | Hi-Potion | Elephant Graveyard | From the Gorge entrance, follow the wall on the left to find the chest against a rock. |
| (5) | Mythril Stone | Elephant Graveyard | On the ledge near the Savannah entrance, near the giant elephant skull. |
| (6) | Ether | Elephant Graveyard | Beside the Savannah entrance. |
| (7) | AP Boost | Elephant Graveyard | From the Gorge entrance, follow the wall on the right to find the chest down the path. |
| (8) | Mythril Shard | Elephant Graveyard | From the Savannah entrance, follow the left path to find the chest in a corner, beside a bone. |
| (9) | Pride Rock Map | Pride Rock | Against the cliff edge in front of Pride Rock. |
| (10) | Mythril Stone | Pride Rock | Against the wall underneath Pride Rock. |
| (11) | Mega Ether | Pride Rock | Follow the edge of the map to find the chest against a wall in the North. |
| (12) | Hi-Potion | Wildebeest Valley | In front of a rock near the Northern end of the area, opposite the Savannah entrance. |
| (13) | AP Boost | Wildebeest Valley | In front of a rock near the Southern end of the area, opposite the Wastelands entrance. |
| (14) | Mythril Gem | Wildebeest Valley | Against the Western wall of the area, nearer the Wastelands entrance. |
| (15) | Mythril Stone | Wildebeest Valley | Against the Western wall of the area, nearer the Savannah entrance. |
| (16) | Tent | Wildebeest Valley | To the left when facing the Wastelands entrance, in the corner by a tree. |
| (17) | Mythril Shard | Wastelands | Against the cliff edge, near the center of the map. |
| (18) | Hi-Potion | Wastelands | Against the rock wall, near the center of the map. |
| (19) | Mythril Stone | Wastelands | Against the rock wall just before the Jungle entrance. |
| (20) | Serenity Stone | Jungle | In front of a collection of ant hills, on the ledge near the Wastelands entrance. |
| (21) | Mythril Stone | Jungle | From the Oasis entrance, follow the path left to find the chest in front of a tree. |
| (22) | Hi-Potion | Jungle | Beside a tree directly opposite the Wastelands entrance. |
| (23) | Oasis Map | Oasis | In the Southwest corner of the map. |
| (24) | Torn Pages | Oasis | In front of a tree in the far East. |
| (25) | AP Boost | Oasis | On the small ledge with the waterfall in the North. |
Disney Castle[edit | edit source]
(1) |
(2) |
(3) |
(4) |
(5) |
(6) |
(7) |
(8) |
| # | Item | Location | Notes |
|---|---|---|---|
| (1) | Mythril Shard | Courtyard | On the ledge beside the topiary of the pig playing the french horn. |
| (2) | Star Recipe | Courtyard | On the highest ledge of the topiary castle that houses the Gummi Hangar entrance. |
| (3) | AP Boost | Courtyard | On the ledge in the corner behind the topiary of the cow playing the cymbals. |
| (4) | Mythril Stone | Courtyard | On the ledge behind the topiary of the pig playing the trumpet. |
| (5) | Ether | Courtyard | On the ledge behind the topiary of the cow playing the flute. |
| (6) | Hi-Potion | Courtyard | Behind the topiary castle that houses the Gummi Hangar entrance. |
| (7) | Mythril Shard | Courtyard | On the ledge beside the topiary of the dog playing the trombone. |
| (8) | Torn Pages | Library | In the Northeast corner of the room. |
Timeless River[edit | edit source]
(1) |
(2) |
(3) |
(4) |
(5) |
(6) |
(7) |
| # | Item | Location | Notes |
|---|---|---|---|
| (1) | Cornerstone Hill Map | Cornerstone Hill | On the ledge in the Southwest. |
| (2) | Drive Recovery | Cornerstone Hill | Against the fence in the Northwest. |
| (3) | Mythril Shard | Pier | In front of a tree in the Northeast. |
| (4) | Hi-Potion | Pier | Under the tree in the Southwest. |
| (5) | Mythril Stone | Waterway | Against the wall near the sign for the Wharf entrance. |
| (6) | AP Boost | Waterway | Beside the river edge in the Northernmost part of the area. |
| (7) | Hi-Potion | Waterway | Beside the windmill near the Pier entrance. |
Halloween Town[edit | edit source]
(1) |
(2) |
(3) |
(4) |
(5) |
(6) |
(7) |
(8) |
(9) |
(10) |
(11) |
(12) |
(13) |
(14) |
| # | Item | Location | Notes |
|---|---|---|---|
| (1) | Hi-Potion | Graveyard | Against the wall in the middle of the fork in the road. |
| (2) | Mythril Shard | Graveyard | On the right of the Curly Hill entrance. |
| (3) | Halloween Town Map | Dr. Finkelstein's Lab | Beside Finkelstein's notebook. |
| (4) | Mythril Stone | Halloween Town Square | On the right of the gates with the pile of presents behind them. |
| (5) | Mega-Potion | Halloween Town Square | Beside the guillotine. |
| (6) | Hi-Potion | Hinterlands | Between two trees in the Northwest. |
| (7) | Mythril Stone | Hinterlands | On the right when facing the Yuletide Hill entrance, against the edge of the map. |
| (8) | AP Boost | Hinterlands | In the East, behind a tree. |
| (9) | Hi-Potion | Candy Cane Lane | On a snowy ledge in the Southwest corner of the area. |
| (10) | Mythril Gem | Candy Cane Lane | East of the Yuletide Hill entrance, on a ledge. |
| (11) | Ether | Candy Cane Lane | To the right of the Christmas Tree Plaza entrance. |
| (12) | Mythril Stone | Candy Cane Lane | To the right of the Santa's House entrance. |
| (13) | Christmas Town Map | Santa's House | Beside Santa's chair, in front of the window that looks out on his sleigh. |
| (14) | AP Boost | Santa's House | To the right of the Save Point. |
Port Royal[edit | edit source]
(1) |
(2) |
(3) |
(4) |
(5) |
(6) |
(7) |
(8) |
(9) |
(10) |
(11) |
(12) |
(13) |
(14) |
(15) |
(16) |
(17) |
(18) |
(19) |
(20) |
(21) |
| # | Item | Location | Notes |
|---|---|---|---|
| (1) | Naval Map | Rampart | Left of the Save Point, beside a cannon. |
| (2) | Mythril Stone | Rampart | Around the corner in the East, in front of the Town entrance. |
| (3) | Ether | Rampart | To the right of the stair platform, next to a cannon. |
| (4) | Ether | Town | At the end of the alley near the Harbor entrance. |
| (5) | AP Boost | Town | Take the stairs near the Rampart entrance and destroy the boxes to expose an alley. Destroy the boxes at other end of this alley to expose a small alcove with the chest. |
| (6) | Mythril Shard | Town | Take the stairs near the Rampart entrance and destroy the boxes to find the chest sitting against a building. |
| (7) | Mythril Gem | Town | Destroy the boxes on the Northern side of the alley near the Harbor entrance to reveal an alcove with the chest. |
| (8) | Ether | Isla de Muerta: Cave Mouth | Along the Western edge of the area. |
| (9) | Mythril Shard | Isla de Muerta: Cave Mouth | Along the Western edge of the area. |
| (10) | AP Boost | Isla de Muerta: Powder Store | Behind the explosive crates on the Northeastern side of the path nearest the Moonlight Nook entrance. |
| (11) | AP Boost | Isla de Muerta: Powder Store | Behind the explosive crates on the Western side of the path nearest the Cave Mouth entrance. |
| (12) | Mythril Shard | Isla de Muerta: Moonlight Nook | By the river in the Southeast. |
| (13) | Ether | Isla de Muerta: Moonlight Nook | In the Northeast corner of the area, by the stairs to the Treasure Heap. |
| (14) | Mega-Potion | Isla de Muerta: Moonlight Nook | Against the Western wall. |
| (15) | Feather Charm | Ship Graveyard: The Interceptor's Hold | Not accessible during first visit. To the right of the Save Point. |
| (16) | AP Boost | Ship Graveyard: Seadrift Keep | Not accessible during first visit. In the corner of the lowest level of the area. |
| (17) | Orichalcum | Ship's Graveyard: Seadrift Keep | Not accessible during first visit. Tucked in the corner along the ramp that connects the upper and lower levels of the area. |
| (18) | Meteor Staff | Ship Graveyard: Seadrift Keep | Not accessible during first visit. Along the Southern wall of the top level of the area. |
| (19) | High Drive Recovery | Ship Graveyard: Seadrift Row | Not accessible during first visit. Just before the bridge, near the Interceptor's Hold entrance. |
| (20) | King Recipe | Ship Graveyard: Seadrift Row | Not accessible during first visit. In front of the circular walkway in the center of the area. |
| (21) | Mythril Crystal | Ship's Graveyard: Seadrift Row | Not accessible during first visit. Near the Seadrift Keep entrance, among the debris along the wall. |
Space Paranoids[edit | edit source]
(1) |
(2) |
(3) |
(4) |
(5) |
(6) |
(7) |
(8) |
(9) |
(10) |
(11) |
(12) |
(13) |
(14) |
| # | Item | Location | Notes |
|---|---|---|---|
| (1) | Pit Cell Area Map | Pit Cell | Only accessible after the door is opened. In the middle of the hallway that leads to the Canyon. |
| (2) | Mythril Crystal | Pit Cell | Only accessible after the door is opened. In the middle of the hallway that leads to the Canyon. |
| (3) | Mega-Potion | Canyon | At the very top of the two ramps near the Datascape entrance. |
| (4) | Mythril Stone | Canyon | At the top of the ramp in front of the Pit Cell entrance. |
| (5) | Mythril Gem | Canyon | In the corner opposite the elevator to the Hallway. |
| (6) | Drive Recovery | Canyon | Near the Pit Cell entrance, beside the door to the central room of the area. |
| (7) | Tent | I/O Tower: Hallway | Against the wall, directly opposite the Canyon entrance. |
| (8) | AP Boost | I/O Tower: Hallway | To the right when facing the Simulation Hangar entrance. |
| (9) | I/O Tower Map | I/O Tower: Communications Room | In the Northeast part of the room. |
| (10) | Gaia Belt | I/O Tower: Communications Room | In the Southeast part of the room. |
| (11) | AP Boost | Central Computer Mesa | Not accessible during first visit. Beside the computer. |
| (12) | Orichalcum+ | Central Computer Mesa | Not accessible during first visit. Beside the computer. |
| (13) | Cosmic Arts | Central Computer Mesa | Not accessible during first visit. Opposite the Save Point. |
| (14) | Central Computer Core Map | Central Computer Mesa | Not accessible during first visit. Opposite the Save Point. |
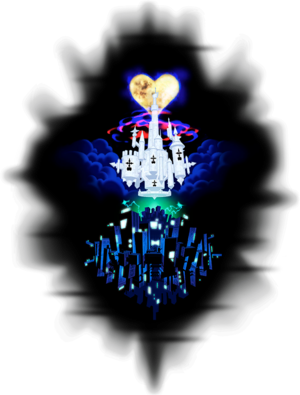
The World That Never Was[edit | edit source]
(1) |
(2) |
(3) |
(4) |
(5) |
(6) |
(7) |
(8) |
(9) |
(10) |
(11) |
(12) |
(13) |
(14) |
(15) |
(16) |
(17) |
(18) |
(19) |
| # | Item | Location | Notes |
|---|---|---|---|
| (1) | Mythril Stone | Fragment Crossing | From the Alley to Between entrance, follow the path to find the chest in a corner. |
| (2) | Mythril Crystal | Fragment Crossing | From the Alley to Between entrance, follow the path to find the chest in a corner. |
| (3) | AP Boost | Fragment Crossing | From the Alley to Between entrance, follow the path to the end of the black road and into the area with the wires in the ground. The chest is on a ledge opposite the entrance into this area. |
| (4) | Orichalcum | Fragment Crossing | From the Alley to Between entrance, follow the path to the end of the black road and into the area with the wires in the ground. The chest is on a ledge to the left of the entrance into this area. |
| (5) | Mythril Crystal | Memory's Skyscraper | Against the wall to the West of the skyscraper. |
| (6) | AP Boost | Memory's Skyscraper | In the Northeast corner, in front of an overturned truck. |
| (7) | Mythril Stone | Memory's Skyscraper | To the left of the The Brink of Despair entrance. |
| (8) | Dark City Map | The Brink of Despair | Beside the Moogle Shop. |
| (9) | Orichalcum+ | The Brink of Despair | On a ledge in the Northwestern corner of the area. |
| (10) | Mythril Gem | Nothing's Call | To the left of the Crooked Ascension entrance. |
| (11) | Orichalcum | Nothing's Call | From the Brink of Despair entrance, take the first ramp to find a small ledge at the top that holds the chest. |
| (12) | Cosmic Belt | Twilight's View | On the same landing as the Save Point. |
| (13) | Mythril Gem | Naught's Skyway | Along the wall, near the Hall of Empty Memories entrance. |
| (14) | Orichalcum | Naught's Skyway | On a tall ledge in the middle of the area. |
| (15) | Mythril Crystal | Naught's Skyway | On the landing at the bottom of the ramp that leads up to the Hall of Empty Melodies. |
| (16) | Mythril Stone | Ruin and Creation's Passage | On the second landing when entering from Naught's Approach. |
| (17) | AP Boost | Ruin and Creation's Passage | On a small ledge on the third landing. |
| (18) | Mythril Crystal | Ruin and Creation's Passage | On the fourth landing when entering from Naught's Approach. |
| (19) | Orichalcum | Ruin and Creation's Passage | On the same landing as the Altar of Naught entrance. |