

Twilight Town is a world introduced in Kingdom Hearts Chain of Memories that also appears in Kingdom Hearts II, Kingdom Hearts 358/2 Days, Kingdom Hearts III, and their subsequent remakes.
A world in constant twilight, Twilight Town is where Roxas came into being. A duplicate version of the town exists as a datascape where Roxas was kept during the restoration of Sora's memories. In Kingdom Hearts II, Twilight Town also serves as a passage to The Mysterious Tower.
Setting[edit | edit source]
Twilight Town is named for its permanently setting sun, which coats the town in hazy orange light. Most of the town is built with brick in orange, brown, and yellow tones, adding to the sunset theme. Bright signs, posters, and noticeboards add splashes of color throughout the streets.
Twilight Town experiences minor layout and aesthetic changes between its appearances in different games, but for the most part remains familiar. The story often starts in a series of backstreets lined with buildings, which leads to a clock tower topped train station in one direction and a bustling shopping common in the other. Underneath all of this lies a series of tunnels. From the station a train can be taken to a residential area, with another train sometimes appearing to whisk its riders away to The Mysterious Tower. The shopping common in turn connects to the woods, which leads to a mysterious mansion. Access to each of these areas varies between game.
Roxas' Room is shown during cutscenes, a small room adorned with beach-themed ornaments and light-up decorations reminiscent of both Destiny Islands and The World That Never Was. A bookcase takes up one wall and sitting nearby is Roxas' yellow bed, pressed against the wall underneath a wide window that overlooks the town. As Roxas' Room is never visited during gameplay, it is unknown where in Twilight Town it is located.
A beach has been mentioned by multiple residents of Twilight Town, but has not been shown in the series thus far.

- The Streets
The central area of Twilight Town is called the Tram Common, taking its name from the boxy tram that loops in a slow circle around the entirety of the area, offering passage to every building in the Common. One such building is the tall, circular tower that stands center of the Common's Southwest corner, bright symbols adorning the sometimes operational storefront cut into its side. Northwest of this building is a path to the rest of Market Street and South is a door to the underground. East is another store that is set into the wall until its expansion in Kingdom Hearts III. North is one more wall storefront, this one also marked by colorful neon symbols. Continuing North from this store leads to a set of stairs that snakes North then East along the wall, eventually leading to a forked path. One end of the fork leads to the roof of one of the unused buildings clustered in the center of the Tram Common. The other path continues along the border of the Common until it reaches a moderately-sized square walled in by tall buildings. Leaving this area via a walkway between buildings leads back to the center of the Common. Skirting the central buildings and following the border in the East leads to a strange hole in the wall, then following the nearby tram path West under a building and then turning South leads to another enclosed square, this one small and empty. Between this square and the hole in the wall lies a gently declining path to a destination that varies by game.
Another popular destination is the Sandlot, a building-surrounded square plot of sand that hosts sporting events. In the Northeast is an entrance to the Tram Common, in the Northwest an entrance to another street, and in the Southwest a small set of stairs.
Taking the stairs leads to the Back Alley, which, as the name suggests, is a narrow walkway between clustered buildings. Halfway up the alley, hidden between two buildings and behind a gate, is The Usual Spot, a small hideaway used by Hayner, Pence, Olette, and their friends.
At the Northern end of the Alley are two entrances: one leading underground, the other to Station Heights. A part of Market Street, Station Heights is lined with more buildings, including some which house storefronts. A small ramp leads to the lower Southeast corner, where two entrances (one to another street, the other to the Sandlot) can be found.
At the far Northern end of Station Heights, at the end of a long inclining path, is the entrance to Station Plaza, the forecourt to Twilight Town's train station. Station Plaza is overlooked by Twilight Town's biggest landmark: the clock tower. A beautiful, pale yellow, red-roofed monolith, the clock tower is topped by a set of antler-like outcroppings, from which giant golden bells hang. The clock itself is a crisscrossing collection of golden circles inlaid with shades of orange and backed with sprinkles of blue, invoking imagery of both the inner workings of a clock and an enchanting sunset sky, much like the one the clock tower is almost always set against. Above the clock face is a ledge that serves as a popular place to sit and look out over the city.
In the Northwest corner of the Plaza is an entrance to the underground and directly underneath the clock tower is a wide set of glass doors that leads to Central Station. The small, blue-bricked station has room for two trains. If the bright blue, star-themed train that may or may not exist is waiting, a journey to The Mysterious Tower is available. The other train is orange and distinctly Twilight Town in design.
- Sunset Terrace
Boarding the orange train results in a short journey to Sunset Station, a small grey boarding platform. Taking the stairs down from the platform leads to Sunset Terrace, a calm collection of yellow buildings and red-brick paths built atop a high cliff. With meandering paths and several secluded nooks and crannies, its no wonder that most of Twilight Town's mythical Seven Wonders are said to be located in this area. In the South, standing at the railed cliff edge gives a spectacular view of the train track towering in the distance, while nearby a tram travels a small, straight track through the Terrace. Central to the Terrace is a small, man-made, terraced stream that cuts North to South and falls off the cliff in a simple waterfall. Crossing the bridge here and heading South leads to a small dirt square with a tall water feature against one wall.
Northwest of the dirt square is an entrance to Sunset Hill, a dirt path lined with grass, bush, and wooden fencing that winds its way up a flat-topped hill. A cream colored miniature statue of the clock tower is the Hill's only adornment. A tunnel has been carved through the hill for the train tracks, creating a fun view of both the train's journey and the Terrace below.
- Underground
Back at Sunset Terrace, near the stream is an archway that leads to the Tunnelway, a path to a large open square with a waterway snaking along its South and West walls. A set of stairs leads from the Tunnelway to the Underground Concourse, a maze-like system of straight paths and staircases and small, off-shooting, square rooms. The color palette of the Concourse is most often a dark mustard yellow, with grey metal grates lining the paths. Bright numbers painted on the walls point to archways out of the Underground, with entrances to Tram Common, Station Plaza, and the Back Alley available.

- The Old Mansion
Climbing through the hole in the Tram Common's wall leads to The Woods, which is, as its name suggests, a circular area filled with trees. The grass is lush and the trees healthy, creating a scenic bridge between the Common and the exit on the other side.
On the other side of the woods is The Old Mansion. A small lawn sits before a tall, orange-brick wall with an imposing wrought iron gate in its center. Heading through the gate leads to a rectangular yard enclosed by brick wall. The East and West walls are lined with overgrown shrubs. A path has been worn through the grass, leading from the gate to the haunting building at the other end of the yard. Ornamental stone pillars used to line both sides of this path, but time has worn them away, leaving broken remnants covered in vines. While the crumbling yard makes the Mansion's "haunted" reputation somewhat understandable, the Mansion itself is in quite good standing. The exterior of the Mansion is colored the warm oranges expected of a Twilight Town building. The entrance is a somewhat standard set of double doors hidden under a bulky, triangle-roofed awning. The gable is decorated with floral carvings and a circular etching of the clock tower, while the front door and the pillars supporting the awning are carved with rivulets that give an almost art deco look. Higher floors of the Mansion can be seen from outside, giving the building a towering splendor. Small towers poke from the center of the building, with a stained glass art piece filling one wall, calling to mind the clock tower carved on the Mansion's front. A large window takes up most of the wall space on the top left of the building, with billowing white curtains blocking the inside from view.
Inside, the mansion is colored in different shades of orange-reds, with light blue patterns decorating the floors. Decor in the Mansion is sparse, but the victorian-esque pieces that remain are in surprisingly good condition. The one standout of the Mansion is The White Room, Naminé's dwelling. This is the room that can be seen from the outside of the Mansion and, like its name suggests, is completely white in both surroundings and decor. The only color in this room comes from the drawings Naminé has hung on the wall and left scattered across surfaces. Other rooms of the Mansion include the Foyer, a large room with two staircases leading up to a walkway and a sealed set of glass doors overlooking a garden between them; the Dining Room, a room in which three thin, stained glass windows overlook a smashed table; and the Library, a square room with filled to the brim bookcases lining two walls and a red-curtained window taking up the other.
The final intrigue of the Old Mansion can be found in the Library, where a symbol on the table can be completed to make the floor disappear. A set of stairs is now accessible, which can be taken down to reach the Computer Room. The Computer Room connects to the Basement Hall, which is attached to the Basement Corridor. All of these rooms are colored in blue shades and designed with a kind of cyberpunk aesthetic. The Computer Room has a few pieces of technology around the room, the Hall is empty (though a portal is sometimes available, allowing passage to The World That Never Was), and the Corridor has a conveyor belt of tall white pods curving around one corner. Past the pods is the entrance to the Pod Room, a circular white area with a singular pod in its center, and the end of the Old Mansion map.
_KHCOM.png)
Kingdom Hearts Chain of Memories[edit | edit source]
As with all the worlds of Kingdom Hearts Chain of Memories, Twilight Town is not shown in its actual form, but as an overlay of a series of connected rooms that make up a floor of Castle Oblivion. Available as the eleventh floor, the Twilight Town created by the cards stays true to the sunset aesthetic of the town. Like the other floors of the castle, the Twilight Town rooms are broken up by platforms at multiple heights, connected by ladders. Barrels, streetlights, and potted plants are the majority decor for each room. Small windows with green trimmings and large windows with yellow and blue striped awnings decorate the walls in often nonsensical numbers. Battle takes place in front of an alley, through which the clock tower's silhouette can be seen in the distance. Ten rooms are available in total, with the lone story room located in the very top corner of the map. It requires a higher than 5 card, a lower than 5 card, a blue map card, and a Key of Beginnings card to open. Entering leads to a confrontation with Vexen, which takes place in the yard in front of The Old Mansion gates.
In Riku's story, Twilight Town is available as Basement Two. Thirteen rooms are available, two being story rooms. Heading two rooms ahead from the entrance room leads to the first story room, which requires a lower than 2 blue map card and a Key of Beginnings to open. The second story room is in the far Northwest corner of the map and requires a 50 card total and a Key of Guidance to open. Entering the second story room leads to a conversation with Naminé in The Old Mansion's Pod Room.
Kingdom Hearts Re:Chain of Memories[edit | edit source]
The improved graphics allow for more detail and a better aesthetic cohesion with the Twilight Town that would appear in other games. Much of the decor and adornments of the real town have replaced the elements shown in Kingdom Hearts Chain of Memories. Battles now takes place in a plot of sand evocative of the Sandlot, but the layout of this area and the sets of stairs surrounding it are decidedly different.
Kingdom Hearts 358/2 Days[edit | edit source]
Accessible areas of Twilight Town vary by mission, with some missions allowing access to multiple areas and others taking place in a single map section. The full map is only used in Mission 23 and Mission 89.
In this game the underground area is called the Underground Passage, the room connected to it the Tunnel, the alley the Side Street, and the room off the alley Under the Tracks. The other available areas are The Old Mansion, The Woods, Tram Common (though the tram itself seems to be missing), Sandlot, Station Heights, and Station Plaza. While the clock tower and Old Mansion interiors are inaccessible, the ledge of the clock tower, The White Room, and the Pod Room appear in cutscenes. The final fight against Xion takes place hovering above Station Plaza, with the clock tower directly behind. Roxas' Room is also seen at the end of the game.
Kingdom Hearts II[edit | edit source]
Kingdom Hearts II features the largest of the Twilight Town maps. This is the only game in which Sunset Terrace, Central Station, and The Old Mansion interiors are accessible. The areas Roxas can visit are dictated by the story, with only certain places available on certain days, much like the setup during missions in Kingdom Hearts 358/2 Days.
Townspeople make regular appearances around the streets. Skateboards have been left in most of the main town areas, and can be used for fast transport. Decorations celebrating the struggle tournament can be seen in various places, especially the Sandlot. During the struggle tournament a raised platform fills the Sandlot, for using during matches. Noticeboards for job listings have been posted in Market Street: Tram Common and Market Street: Station Heights. The enclosed area in the Northeast of the Tram Common is infested with bees. In this game the tram runs counterclockwise, except for during minigames, during which it remains stationary.
During Roxas' story, the Southern shop in Station Heights is a grocer and the shop opposite sells weapons. In the Tram Common, the round shop is a candy shop run by an old woman, the shop by the stairs sells accessories, and the final shop sells armor. While Roxas can converse with the merchants of every shop, he cannot buy from them. While the accessory and armor shops remain the same, on Sora's first visit the round shop is closed and on his second visit the shop is run by a Moogle and can be used for synthesis. In Station Heights the weapons shop is the same, while the grocer now sells items.
Though not accessible, Roxas' Room and the clock tower ledge are shown during cutscenes.
The Twilight Town of Kingdom Hearts II is also notable for offering passage to two different worlds: during Sora's first visit, The Tower is made available via a train at Central Station, and during his second visit The World That Never Was is made accessible via a portal in Mansion: Basement Hall.
Kingdom Hearts III[edit | edit source]

- The Neighborhood
In Kingdom Hearts III, many of the previously regular areas are inaccessible and what remains has been amalgamated into an area called The Neighborhood. The Tram Common is similar in layout to most of its previous appearances, with familiar places given new purpose: the tram circles clockwise around the area; a Moogle shop is located in the Southwest round building; Huey, Dewey, and Louie run a Gummi shop from the West wall; and the buildings clumped in the middle of the area now offer rooftop seating. The Common's color palette remains the same, but new details can be seen on every surface. Townspeople mill everywhere and decorations are much more regular, with trees, signs, and even litter adding a highly trafficked feel. The biggest change to Tram Common comes in the removal of the shop in the South and the small empty square that sat near it. In their place is Le Grand Bistrot, the golden-windowed restaurant that sits behind a recessed patio dotted with quaint metal tables for its patrons. Another big change has occurred in the Northeast square: the ground had been filled with rows of wooden benches and a large projector screen fills one wall. This square is now a makeshift cinema, with old clips of King Mickey's escapades playing out for anyone in the mood for entertainment. The entrances to the wood and underground have been sealed up and the entrance to Station Heights now gives the option to return to the World Map, leaving only the declining path in the Southeast as an exit. For the first time, the area past the arch at the end of this path has been expanded, revealing a litter filled alley.
From the alley, a drop into a dingier walkway and a short slide down a metal ramp leads to the underground, now called the Underground Conduit. This version of the Conduit is much more straightforward than usual, presenting as a long series of straight hallways. Here the Conduit has a red, grey, and dingy green color scheme, with metal and concrete being the primary construction materials. Litter is scattered throughout the halls and both walls and floor are covered in grime and puddles from the large pipes dribbling water from the walls. At the end of the Conduit is a long flight of stairs that leads to a wooden hatch.
Climbing through the hatch leads to The Woods, which—while aesthetically similar to its previous iterations—has expanded in size. The trees are taller and more plentiful than ever shown before, allowing more room for exploration. A tall wall now blocks the Eastern side of The Woods and a path has been worn through the grass. Following the path leads to The Old Mansion, which looks the same as it has in previous games. The interior of the mansion is inaccessible, but the Computer Room is briefly shown during cutscenes.
Story[edit | edit source]
Kingdom Hearts III[edit | edit source]

Searching for a way to get Roxas back, Sora, Donald, and Goofy journey to Twilight Town. As they reach the common, Sora is excited to see the trams again, which brings Goofy to suggest that maybe those feelings are from Roxas, excited to be back home. Sora recalls seeing Roxas in the sleeping worlds, and then Donald brings up Roxas' appearance in the Datascape, which Goofy points out was part of a test to see if Sora was ready to handle hurt. Sora thinks about this, remembering his time separated from his friends, and comes to the realization that hurting is part of caring. He follows this with the declaration that he is going to find Roxas, but as soon as he says the words out loud, a mysterious voice enters his head, quickly followed by the appearance of a group of Nobodies.[1]
Once the Nobodies are defeated, Sora wonders aloud what the voice was, but isn't given any further time to think as Hayner, Pence, and Olette appear, followed by a Demon Tide.[2] After fighting the Heartless off, Sora, Donald, and Goofy find Hayner, Pence, and Olette and explain that they are trying to bring Roxas back. Hayner, Pence, and Olette don't know anyone by that name, but they remark that it sounds familiar, so Goofy shows them the picture from the Simulated Twilight Town that shows them in front of the Old Mansion with Roxas. Intrigued, Hayner, Pence, and Olette decide to ask around town about Roxas, while Sora, Donald, and Goofy decide to journey ahead to the Old Mansion. Before separating, the group take a photo together with Sora's Gummiphone, which leads to his first discovery of a Lucky Emblem.[3]
As Sora and company make their way through the woods, they find a small rat surrounded by Heartless.[4] They defeat the Heartless and bid the rat farewell, but before they can leave the rat climbs atop Sora's head. The rat tugs on Sora's hair and Sora finds himself hijacked, turning this way and that at each tug of his hair. Controlling Sora—much to the amusement of Donald and Goofy—the rat makes it clear that he is interested in the fruit on the ground. Sora offers to help him collect the fruit, under the condition that he do so on his own and not under the control of the rat. When the trio has gathered the fruit they ask the rat what he wants it for, but when he mimes his answer Sora, Donald, and Goofy are unable to understand it, so they simply wish the rat well and continue on their way.[5]
They arrive at the Old Mansion and Sora is momentarily struck by one of Roxas' memories. He shakes it off just in time for the arrival of Hayner, Pence, and Olette, who reveal that their inquiries around town didn't yield any results. Knowing the Mansion is their last hope for clues, the group enters the abandoned building and returns to the transporter in the basement. Pence attempts to access the transporter, but finds the program blocked. Ienzo then calls Sora on the Gummiphone and explains that while attempting to decipher Ansem's Code, he received an alert that someone was trying to access the terminal in Twilight Town. With Pence's assistance, Ienzo is able to set up a network between the two worlds. Intrigued by the concept of a digital world within Ansem's computer, Ienzo explains that with Pence's help, he may be able to retrieve Roxas' data from the computer. Before hanging up, Ienzo reveals to Sora that Even, the former Organization XIII member known as Vexen, has disappeared and Sora should be careful. Hayner and Olette leave, hurrying back to town for work commitments, and Sora, Donald, and Goofy head back outside.[6]

On their way out of the mansion, Sora, Donald, and Goofy are shocked to find both Xemnas and Ansem waiting for them. Xemnas and Ansem mock Sora's attempts to bring back Roxas, pointing out the flaws in his plan, but Sora refuses to let them get to him. The pair then suggest Sora's only option is to succumb to darkness and they summon a group of Heartless and Nobodies, before retreating through a portal of darkness.[7] Sora, Donald, and Goofy defeat the summoned enemies and then Sora thinks back on his conversation with Hercules in Olympus, about knowing with all your heart. With more conviction that ever, Sora decides he will restore Roxas, with Donald and Goofy enthusiastically agreeing to help. First, however, they decide they must head back in to town to warn Hayner and Olette of the Organization's presence, just in case.[8]
Once in town, they run into Scrooge McDuck, who reveals that the little rat they rescued in the forest is actually Little Chef, the cook behind Scrooge's new Twilight Town restaurant, Le Grand Bistrot. Little Chef gifts the trio with a tarte aux fruit as thanks for saving him, as Scrooge explains that he recruited the rat after tasting his incredible food. Little Chef says that he'd like to cook more for the group, so Scrooge encourages them to find ingredients that he can use, a task Sora eagerly agrees to.[9] Hayner and Olette appear and are revealed to have been working for Scrooge, putting up posters to advertise a movie festival for the town. Olette teaches Sora how to scan the posters to unlock promotional games on his gummiphone and then Sora tells the pair about the Organization's presence and warns them to keep safe. He also asks them to keep Roxas in their hearts and wish for his return, a favor they promise to fulfill.
High above the town, watching over the group, are Ansem and Xemnas, who are soon joined by Xigbar. They remark that they'll guide Sora, but if he wavers from their path, they'll destroy him.[10]
Characters[edit | edit source]


- Roxas is shown in a photo in the cutscene "The Friend They'd Never Met" and as part of a memory in the cutscene "Datascapes".
- A Moogle fronts the Moogle Shop in the Tram Common.
- Huey, Dewey, and Louie front the Gummi Shop in the Tram Common.
- Mickey Mouse is seen in the film playing at the Tram Common theatre and shown on a poster in the cutscene "We'll All Wish".
- Rumplewatt the Giant (the giant from the Mickey Mouse short Giantland) is seen in the film playing at the Tram Common theatre and shown on a poster in the cutscene "We'll All Wish".
- Ienzo appears via Gummiphone in the cutscene "Datascapes".
- Vexen is shown as a memory in the cutscene "Datascapes".
- Ludwig Von Drake (a Walt Disney cartoon character and relative of Donald Duck) is mentioned on a poster in the cutscene "We'll All Wish".
- Various townspeople can be found across the Tram Common.
Enemies[edit | edit source]
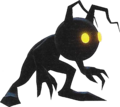
Heartless[edit | edit source]
- Demon Tide KHIII.png
- Neoshadow KHIII.png
- Powerwild KHIII.png


Nobodies[edit | edit source]
- Dusk KHIII.png
- Sniper KHIII.png
References[edit | edit source]
- ↑ Kingdom Hearts III: "Nostalgic Streets"
- ↑ Kingdom Hearts III: "Hello, Good-bye"
- ↑ Kingdom Hearts III: "The Friend They'd Never Met"
- ↑ Kingdom Hearts III: "A Forager in Distress"
- ↑ Kingdom Hearts III: "Under Control?"
- ↑ Kingdom Hearts III: "Datascapes"
- ↑ Kingdom Hearts III: "Ansem and Xemnas"
- ↑ Kingdom Hearts III: "Sora's Resolve"
- ↑ Kingdom Hearts III: "The Bistro's Little Chef"
- ↑ Kingdom Hearts III: "We'll All Wish"